Wire a Subpanel
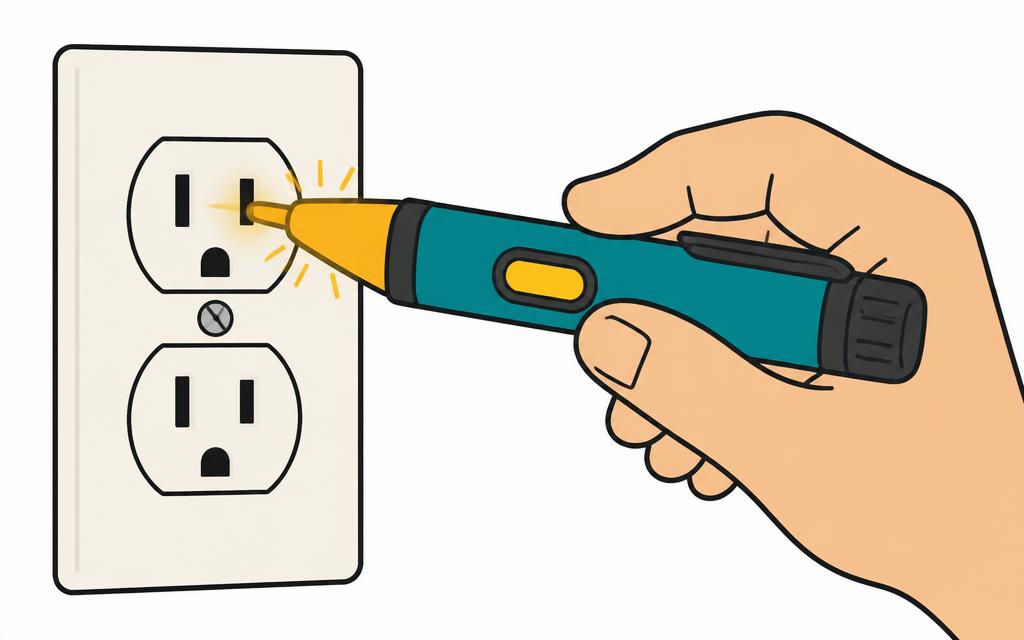
Turn off the breaker and verify power is off before working. If you are not comfortable, hire a licensed electrician.
How to verify a dead circuitPull a permit and plan the feeder. Decide the subpanel size (60A feeds a small shop or garage; 100A suits an addition or detached building), then confirm the main service can carry the added load with a load calculation. Most jurisdictions require a permit and inspection for any new feeder.
Size the feeder conductors and the equipment ground. Common residential picks: 60A feeder on #6 copper THHN with a #10 copper ground; 100A feeder on #3 copper (or #1 aluminum) with a #8 copper ground. Upsize a wire gauge on long runs to hold voltage drop under 3%.
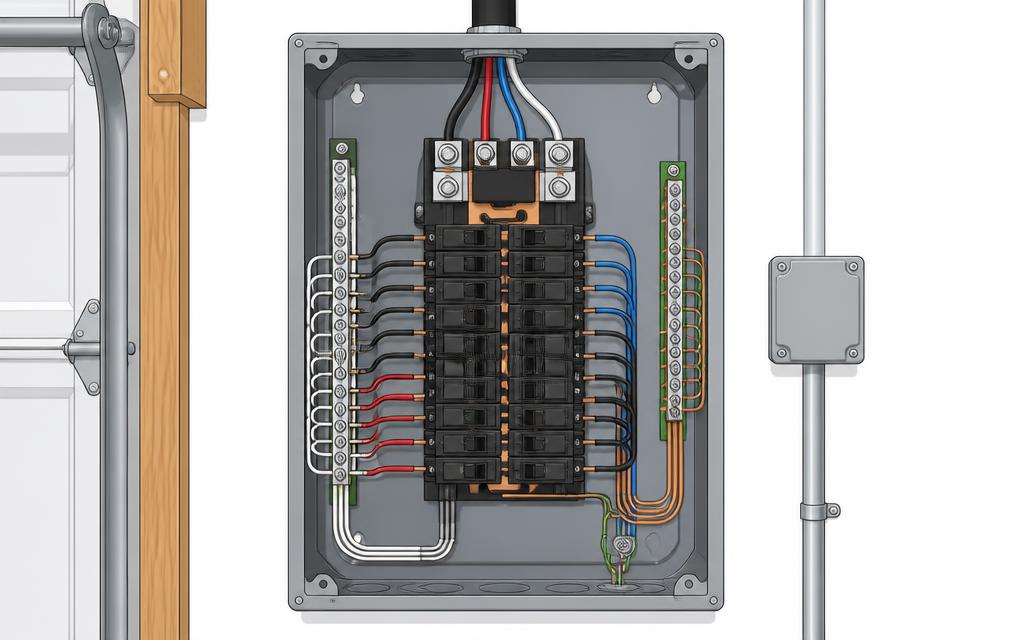
Shut down and verify dead. Turn off the main breaker, then test line-to-line, line-to-neutral, and line-to-ground at the point where you will land the feeder breaker. Prove your tester on a known-live circuit afterward. The main lugs stay energized even with the main off - never touch them.
Mount the subpanel and run the feeder. Set the panel at code height with working clearance in front, then run the 4-wire feeder in cable or conduit, secured within the required support intervals and protected wherever it passes through framing.
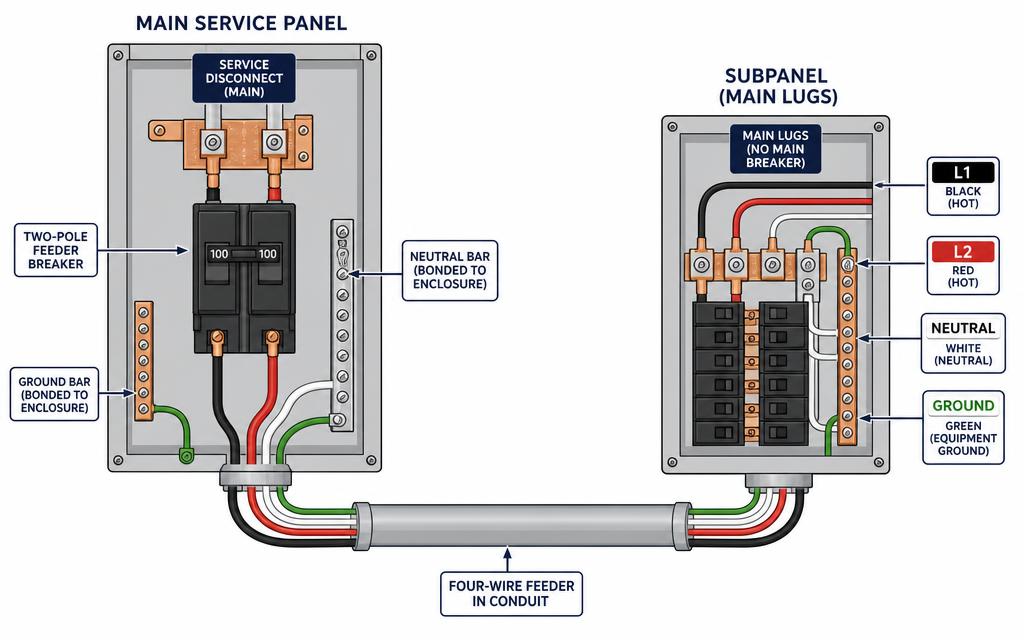
Install the feeder breaker in the main panel. Snap a 2-pole breaker matching the feeder ampacity onto the bus, land both hots on it, land the feeder neutral on the neutral bar, and land the feeder ground on the ground bar. Torque every lug to the printed spec.
Remove the bonding screw or strap in the subpanel and add a separate ground bar. This is the step people get wrong: in a subpanel, the neutral bar must float - isolated from the enclosure - and the equipment grounds go on their own bar bonded to the can. Leaving the bond in place puts neutral current on the metal enclosure and defeats the fault-clearing path.
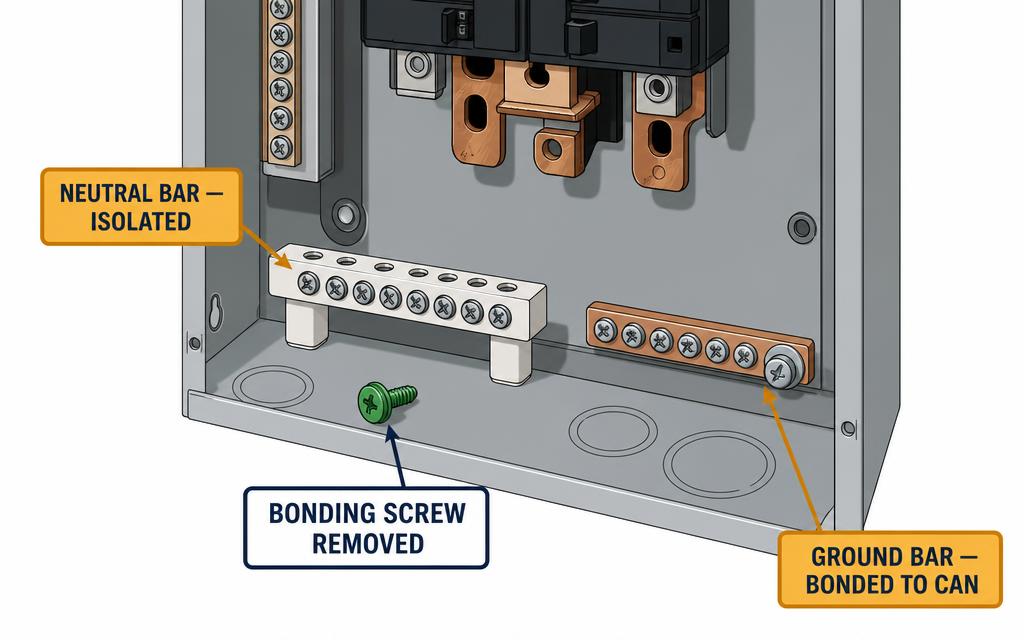
Land the feeder in the subpanel. Two hots to the main lugs or main breaker, the feeder neutral to the isolated neutral bar, and the feeder ground to the bonded ground bar. Keep neutrals and grounds separate from here forward, one conductor per terminal hole.
For a detached building, add a grounding electrode system. A subpanel in a separate structure needs its own grounding electrode (ground rod or rods) bonded to the subpanel ground bar, while the equipment ground still runs back with the feeder. The neutral stays isolated.
Terminate branch circuits, then label and close up. Hots on breakers, neutrals on the isolated neutral bar, grounds on the ground bar - one wire per hole. Torque all terminations, fill out the circuit directory, install the dead front, then energize the feeder breaker and verify 240V line-to-line and 120V line-to-neutral.
A subpanel means working inside a live service panel, where the main lugs stay hot even with the main breaker off. This is the job to hire a licensed electrician for - or at minimum have them make the connection in the main panel while you handle the rough-in under permit.
- Voltage tester and multimeter
- Torque screwdriver / torque wrench
- Insulated screwdrivers and nut driver set
- Lineman pliers and cable cutters
- Cable strippers for large conductors
- Hole saw and knockout punch
- Flashlight or headlamp
- Label maker or panel directory
- Subpanel (load center) with main lugs or main breaker
- Feeder breaker sized for the subpanel (60A or 100A typical)
- 4-wire feeder cable or conductors: two hots, one neutral, one equipment ground
- Separate ground bar kit for the subpanel
- Cable connectors / conduit fittings sized for the feeder
- Anti-oxidant compound if using aluminum conductors
- Circuit directory and permanent marker